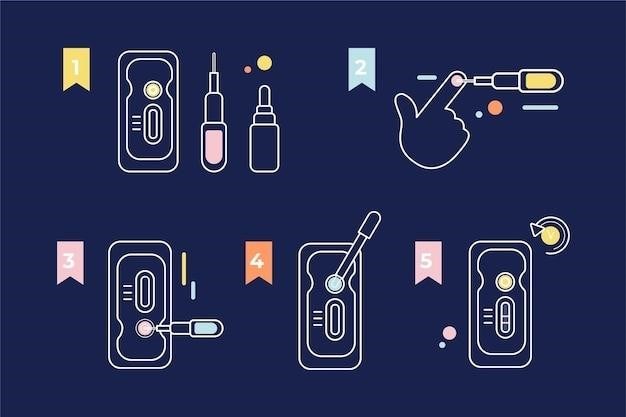
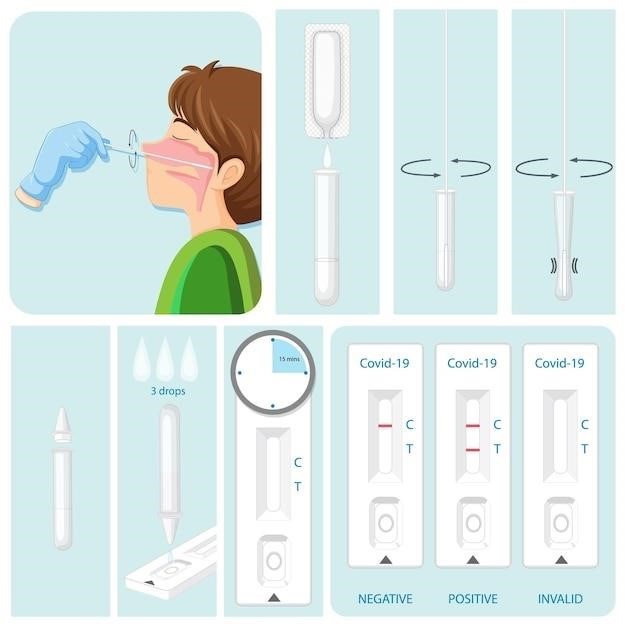
The PleurX Catheter System is a safe and effective way to drain fluid from your chest or abdomen. This system is designed for home use, and these instructions will help you understand how to use it properly. Please read these instructions carefully and watch the Drainage Video for more detailed instructions. Remember to consult your doctor if you have any questions.
Introduction
Your doctor has prescribed a PleurX drainage system to drain extra fluid from your chest or abdomen. This system is designed to be used at home, and it allows you to manage your condition more effectively. The PleurX Catheter System is a comprehensive portfolio that provides all the items necessary to successfully place the PleurX catheter, support and train your patients, and help ensure safe and effective drainage by patients or their caregivers. The PleurX Catheter may be placed in your chest to drain fluid from around your lungs or it may be placed in your abdomen to drain fluid that builds up in that area. The PleurX Pleural Catheter System is indicated for intermittent, long term drainage of symptomatic, recurrent, pleural effusion, including malignant pleural effusions and other recurrent effusions that do not respond to medical management of the underlying disease. The PleurX catheter is inserted in the abdomen for draining malignant ascites. The end of the catheter stays outside of your body, covered by a thin protective cover. This video and the instructions that came with the system explain exactly how to use it. If you have any questions or concerns, contact your nurse or doctor.
Getting Started
Before you begin draining fluid from your PleurX catheter, it’s important to gather all the necessary supplies and prepare yourself for the procedure. This will ensure a smooth and safe drainage process.
Here are the steps you need to take to get started⁚
Gather all drainage supplies⁚ This includes the drainage bottle, drainage line, access tip, valve cap, cleaning wipes, and any other materials provided with your PleurX drainage kit.
Thoroughly wash your hands⁚ It is crucial to wash your hands with soap and water for at least 1 minute before handling the catheter or drainage supplies. This will help prevent infection.
Open all packaging⁚ Carefully open all packaging for the drainage supplies, making sure to dispose of the packaging materials properly.
Unfold the blue wrapping⁚ If your drainage kit includes a blue wrapping, unfold it completely.
Place the bottle near your catheter⁚ Position the drainage bottle in a convenient location near your catheter.
Squeeze the clamp on the drainage line completely closed⁚ This will prevent fluid from flowing out of the drainage line until you are ready to drain.
Remove the cover from the access tip⁚ Carefully remove the protective cover from the access tip of your catheter.
Take the valve cap off your catheter⁚ Remove the valve cap from your catheter, exposing the valve opening.
Clean around the valve opening⁚ Use a cleaning wipe to clean around the valve opening, removing any dirt or debris.
Connect the drainage line to the access tip⁚ Gently insert the end of the drainage line into the access tip of your catheter.
1Connect the drainage line to the bottle⁚ Attach the other end of the drainage line to the drainage bottle.
1Release the clamp on the drainage line⁚ Gently release the clamp on the drainage line, allowing the fluid to drain into the bottle.
Connecting the Drainage Bottle
Connecting the drainage bottle to your PleurX catheter is a crucial step in the drainage process. Ensuring a secure and clean connection is essential to prevent leaks and potential infection. Here’s how to connect the drainage bottle⁚
Prepare the drainage bottle⁚ Make sure the drainage bottle is clean and empty. If you’re using a new bottle, remove the protective cap and discard it appropriately.
Locate the drainage line connection⁚ The drainage bottle will have a designated opening or port where the drainage line connects.
Attach the drainage line⁚ Gently insert the end of the drainage line into the bottle’s connection point. Make sure the line is securely attached to prevent leaks.
Secure the connection⁚ Some drainage bottles may have a locking mechanism or a secure cap that needs to be tightened to ensure a tight seal.
Check for leaks⁚ Once the drainage line is connected, gently squeeze the drainage line near the bottle connection to check for any leaks. If you see any leaks, re-secure the connection.
Position the bottle⁚ Place the drainage bottle below the level of your catheter. This will ensure that gravity assists in the drainage process.
Empty the bottle periodically⁚ As fluid drains into the bottle, it will fill up. Empty the bottle regularly to avoid overflow.
Dispose of the fluid⁚ Dispose of the drained fluid according to your healthcare provider’s instructions.
Clean the bottle⁚ After each drainage session, clean the drainage bottle thoroughly with soap and water. Rinse it well and allow it to air dry completely before storing it for future use.
Remember, always follow the specific instructions provided with your PleurX drainage kit for connecting the drainage bottle. If you have any questions or concerns, consult your healthcare provider.
Draining Fluid
Once you have connected the drainage bottle to your PleurX catheter, you are ready to drain fluid from your chest or abdomen. This process involves carefully removing excess fluid to alleviate discomfort and improve your breathing. Here’s a step-by-step guide to draining fluid using your PleurX catheter⁚
Gather supplies⁚ Have your PleurX drainage kit ready, including the drainage bottle, drainage line, access tip, and any other necessary supplies.
Wash your hands⁚ Thoroughly wash your hands with soap and water for at least 20 seconds before handling the catheter or drainage bottle to prevent infection.
Prepare the catheter⁚ Locate the valve on your catheter. If you are using a new bottle, carefully remove the cap from the access tip. Make sure the access tip is clean and free of any debris.
Connect the drainage line⁚ Gently insert the access tip into the valve opening. Make sure it is securely connected.
Open the drainage line⁚ Locate the clamp on the drainage line and gently open it. This will allow fluid to flow from the catheter into the bottle.
Monitor fluid flow⁚ Observe the flow of fluid into the bottle. If the flow is slow, you may gently squeeze the drainage line near the access tip to encourage drainage. Do not squeeze too hard, as this could damage the catheter.
Drain until fluid stops⁚ Continue draining fluid until it stops flowing. You may need to drain for several minutes.
Close the drainage line⁚ Once fluid stops flowing, close the clamp on the drainage line. Then carefully disconnect the access tip from the valve.
Secure the access tip⁚ If using a new bottle, replace the cap on the access tip. If you are using a bottle that has been previously used, store it properly.
Clean the catheter⁚ After draining, use a sterile wipe to clean the access tip and the surrounding area to prevent contamination;
Always refer to the specific instructions provided with your PleurX drainage kit for detailed guidance on draining fluid. If you encounter any difficulties or have any questions, contact your healthcare provider immediately.

How Much Fluid to Drain
Determining how much fluid to drain from your PleurX catheter is crucial for maintaining your health and well-being. Draining too much fluid too quickly can lead to complications, while draining too little can leave you feeling uncomfortable. Your healthcare provider will provide specific instructions on how much fluid to drain at each session, considering your individual needs and medical history.
A general guideline is to limit the amount of fluid drained from your chest to no more than 1,000 mL (1 liter) at a time. For abdominal drainage, the limit is typically 2,000 mL (2 liters).
However, it’s important to follow your doctor’s instructions carefully, as they may adjust these limits based on your specific circumstances.
During drainage, be attentive to your body’s signals. If you experience any chest pain, shortness of breath, or discomfort, stop draining immediately and contact your doctor.
While draining fluid from your PleurX catheter can alleviate discomfort and improve your breathing, it’s not a cure for the underlying condition causing the fluid buildup.
Regularly scheduled drainage sessions, as prescribed by your doctor, will help manage the fluid in your chest or abdomen and provide you with much-needed relief. Always follow your doctor’s instructions carefully and seek their advice if you have any concerns or questions.
How Often to Drain
The frequency of draining your PleurX catheter is determined by your doctor and depends on the amount of fluid buildup in your chest or abdomen. Most people need to drain their catheter every day, but some may need to drain it less often.
It’s essential to follow your doctor’s instructions carefully and maintain a consistent drainage schedule. Changing your drainage frequency without consulting your doctor could lead to complications.
During your initial consultations, your doctor will assess your individual needs and advise you on the optimal drainage frequency. This assessment will take into account factors such as the underlying cause of the fluid buildup, the rate of fluid accumulation, and your overall health condition.
If you experience a significant increase in fluid accumulation, shortness of breath, or discomfort between scheduled drainage sessions, contact your doctor immediately. They may need to adjust your drainage frequency to address the increased fluid buildup.
Regularly scheduled drainage sessions, as prescribed by your doctor, will help manage the fluid in your chest or abdomen and provide you with much-needed relief. Always follow your doctor’s instructions carefully and seek their advice if you have any concerns or questions.
Post-Drainage
After you’ve drained the fluid from your PleurX catheter, it’s important to follow these post-drainage steps to ensure proper care and minimize the risk of complications⁚
Clean the Catheter and Access Tip⁚ Gently clean the catheter and access tip with an alcohol wipe. This helps prevent infection and maintain the cleanliness of the drainage system.
Secure the Catheter⁚ Once you’ve finished draining, ensure the catheter is securely fastened to your skin. This helps prevent accidental dislodgement and potential complications.
Dispose of Drainage Supplies⁚ Properly dispose of the used drainage bottle and other supplies according to your healthcare provider’s instructions. This helps maintain hygiene and prevent the spread of germs.
Monitor for Complications⁚ After each drainage session, monitor for any signs of infection, such as redness, swelling, or pain around the catheter site. If you notice any unusual symptoms, contact your doctor immediately.
Record Drainage⁚ Keep a record of each drainage session, including the date, time, and amount of fluid drained. This information is helpful for your doctor to track your progress and make adjustments to your treatment plan if needed.
Following these post-drainage steps will help you maintain the cleanliness and functionality of your PleurX catheter, minimize the risk of complications, and ensure your overall well-being.
Troubleshooting
While using your PleurX catheter, you might encounter some minor issues that can be easily resolved. Here are some common troubleshooting tips⁚
No Drainage⁚ If you don’t see any fluid draining, first ensure the clamp on the drainage line is open and the access tip is properly connected to the valve. Gently squeeze the catheter and drainage line to see if this helps loosen any blockage. If the issue persists, check if the drainage bottle is full. If it is, replace it with a new bottle.
Slow Drainage⁚ If the drainage is slow, try gently squeezing the catheter and drainage line to see if this increases the flow. If the issue persists, it may indicate a partial blockage. Contact your healthcare provider for guidance on how to address this.
Leakage⁚ If you notice leakage around the access tip or catheter site, check if the connections are secure. If they are, you may need to tighten the clamps. If leakage continues, contact your healthcare provider for assistance.
Catheter Dislodgement⁚ If the catheter becomes dislodged, gently try to reinsert it. If you are unable to do so, contact your healthcare provider immediately.
Excessive Drainage⁚ If you drain more than the recommended amount of fluid, stop the drainage and contact your healthcare provider immediately. This could indicate a serious issue that requires medical attention.
Always remember to keep the catheter and access tip clean and follow your healthcare provider’s instructions for proper drainage and care. If you experience any persistent issues or concerns, don’t hesitate to reach out to your healthcare provider;
Safety Precautions
Using a PleurX catheter system requires adherence to certain safety precautions to ensure a smooth and safe experience. Here are some important points to remember⁚
Hand Hygiene⁚ Always wash your hands thoroughly with soap and water for at least 20 seconds before and after each drainage session. This helps prevent infection.
Sterile Technique⁚ Use sterile gloves and equipment when connecting the drainage bottle and handling the access tip. This minimizes the risk of contamination.
Drainage Bottle Placement⁚ Always keep the drainage bottle below the level of your catheter to ensure proper gravity drainage.
Drainage Volume⁚ Do not drain more than 1,000 mL from your chest or 2,000 mL from your abdomen at any one time. Excessive drainage can lead to complications.
Drainage Frequency⁚ Follow your healthcare provider’s instructions regarding the frequency of drainage. Do not change the drainage schedule without consulting your doctor.
Catheter Care⁚ Keep the catheter and access tip clean and dry. If you notice any redness, swelling, or drainage around the catheter site, contact your healthcare provider immediately.
Avoid Contact Sports⁚ While using the PleurX catheter, it’s advisable to avoid contact sports and activities that could potentially cause injury to the catheter site.
Travel Precautions⁚ If you need to travel, consult your healthcare provider for instructions on how to manage your catheter during travel.
By following these safety precautions, you can minimize the risk of complications and ensure a safe and effective experience with your PleurX catheter system.
Complications
While the PleurX catheter system is generally safe and effective, potential complications can arise. It’s crucial to be aware of these possibilities and seek immediate medical attention if you experience any of the following⁚
Infection⁚ Infection is a potential risk with any indwelling medical device. Signs of infection may include redness, swelling, pain, or drainage around the catheter site, fever, or chills.
Bleeding⁚ Bleeding around the catheter site can occur, especially after the initial placement. If you notice significant bleeding, contact your healthcare provider immediately.
Catheter Dislodgement⁚ The catheter can occasionally become dislodged. If this happens, gently try to reposition it. If you’re unable to do so, contact your healthcare provider.
Catheter Obstruction⁚ The catheter may become blocked with fluid or debris. If drainage slows or stops, try gently squeezing the catheter and drainage line. If this doesn’t work, contact your healthcare provider.
Pneumothorax⁚ In rare cases, a pneumothorax (collapsed lung) can occur during catheter placement or drainage. Signs of pneumothorax include shortness of breath, chest pain, and rapid heart rate.
Fluid Leak⁚ A fluid leak from the catheter site can occur. If you notice a leak, contact your healthcare provider.
Skin Irritation⁚ Skin irritation around the catheter site is possible. If you experience irritation, try using a gentle skin cleanser and moisturizer.
Psychological Distress⁚ Managing a chronic condition like pleural effusion can be emotionally challenging. It’s important to seek support from family, friends, and healthcare professionals.
It’s essential to remember that these are potential complications and not everyone will experience them. However, being aware of these possibilities allows you to recognize any problems promptly and seek appropriate medical care. Always consult your healthcare provider for any concerns or questions regarding your PleurX catheter system.


Leave a Reply
You must be logged in to post a comment.